How to make a handmade card for father’s day?

A greeting card is the most beautiful and amazing way to express your love for others. If you give a card to someone, he or she feels your love and affection, and he considers himself special in your life. Many people have a remarkable and particular place in your life, like your mother, father, siblings, friends, etc.

There are a lot of father’s day cards available in the market. What is the more effective way to show your love to your father other than giving a handmade card? In this way, you can make him feel special that you spend so much time in creating a DIY card to greet him on Father’s day. You can try many father’s day ideas, but the wishing card is at the top.

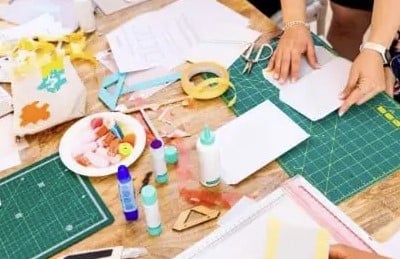
Making a handmade card is a time-consuming task and not an easy one. As father’s day 2020 is coming soon, so we are here to help you out so that you can make your father happy through giving him a DIY father’s day greeting card.

Method 1:

  1. Take an 8 1/2″ * 11″ paper and cut it in half by a scissor or trimmer.
  2. Now you have to use a side-folded base card of 4.25″ x 5.5″.
  3. Now take a 4.25″ x 5.5″ blue-patterned paper and stick it at the front.
  4. Keep a 2.5″ x 5.5″ stripped-designed paper and paste it on the right side.
  5. Punch a frame-like design with red ink on a Kraft-colored cardstock of 2.5″ x 3.25″.
  6. Joint it at the bottom-right corner.
  7. Now, take black ink and imprint “Number One Dad” in the middle of the red frame.
  8. Punch a sunglasses on an off-white cardstock with black ink. Carefully cut this image and paste it above the red frame.
  9. Now, we add a “Hey Handsome” to the card’s top left side to make this card cooler.
  10. Stamp one star at the joint of blue and striped card and punch two stars at the coordinating line of blue card and red frame.
  11. Now complete your card by binding baker’s twine around the card’s crease.

Here is your DIY card ready.

Method 2:

  1. Take a cardstock and stamp the word “DAD” in a big and symmetrical font on it. “DAD” must be 2.5 inches high and 2 inches wide.
  • Turn over a printed cardstock and paint on the opposite side. It is essential to dry one color before adding others. You will get a fun design while finishing it.
  • Now, spread gesso on your created design.
  • In the next step, stamp words by using contrasting colors, but you have to do it after drying the surface.
  • When ink is dry, you have to cut out each letter with the help of printed letters to make the word “DAD.” Paste every letter on an adhesive cork sheet and keep the painted side above.
  • Now, you can easily cut each letter from the cork sheet.
  • Do some detailing to the punched words by using a metallic marker.
  • Organize the letters on a blank card.
  • The last step is to select and write some wishes among so many father’s day card messages, and there you go.

So, make your own father’s day card to show appreciation to your father.


Related Destash

How to Organize Your Art & Crafting Supplies

How to Organize Your Art & Crafting Supplies: A Comprehensive GuideHow to Organize Your Art & Crafting Supplies: A Comprehensive Guide

Crafting is not just a pastime; it’s a passion that allows individuals to express their creativity. However, as anyone who engages in crafting knows, organizing supplies can quickly become overwhelming. A cluttered workspace can hinder your creative process and make it challenging to find the materials you need. In this article, we will explore effective ways to organize your crafting supplies, ensuring both functionality and inspiration as you embark on your next project.

1. Assess Your Supplies

Before diving into organization, take the time to assess what you have. This initial step is crucial for a successful organization system.

Steps to Assess Your Supplies:

1. Gather Everything: Collect all your crafting materials from various locations in your home.

2. Sort By Type: Categorize items into groups—such as paper, fabric, paint, and tools.

3. Review Quantity: Note how many of each type you have. This will help you determine how much space you need for storage.

By evaluating your supplies, you can identify which items are necessities and which can be discarded or donated.

2. Choose Storage Solutions

Once you have a clear understanding of your supplies, the next step is selecting appropriate storage solutions. The right tools can make a significant difference in maintaining an organized space.

Popular Storage Options:

1. Baskets and Bins: Ideal for larger items like yarn or fabric. Clear bins help you see your materials at a glance.

2. Drawer Organizers: Perfect for smaller items such as beads, buttons, or tools. These can easily fit in a workspace drawer.

3. Shelving Units: Utilize vertical space by installing shelves to store larger items or displays of finished crafts.

4. Pegboards: A creative way to hang tools and frequently used supplies within reach.

By carefully selecting appropriate storage options, you create a functional workspace that’s tailored to your unique crafting style.

3. Implement a Labeling System

An effective labeling system is essential for quick access and ensuring everything has a designated place.

Labelling Techniques:

1. Use Clear Labels: Label bins and shelves clearly, indicating the contents inside.

2. Color Coding: Assign colors to different categories, making it visually appealing while aiding in quick identification.

3. Digital Inventory: Consider keeping a digital inventory that outlines what you have and where it’s located. Apps and spreadsheets can help in tracking supplies.

By implementing a labeling system, you will drastically reduce the time spent searching for materials and maintain a clean workspace.

4. Create a Dedicated Crafting Space

Establishing a dedicated crafting space in your home can enhance organization and spark creativity. This doesn’t require a large area; even a small corner can work wonders.

Tips for Creating a Crafting Space:

1. Choose a Well-Lit Area: Good natural or artificial light can significantly improve your crafting experience.

2. Arrange an Easily Accessible Workspace: Ensure your most used tools and supplies are within arm’s reach.

3. Add Inspirational Decor: Personalizing your space with inspirational artwork or quotes can motivate you during creative sessions.

Having a dedicated space not only keeps your materials organized but also fosters a creative environment where you can focus on your projects.

5. Maintain Your Organized Space

Organization is not a one-time task; it requires ongoing maintenance to ensure your crafting supplies remain neatly arranged.

Maintenance Tips:

1. Regular Inventory Checks: Set a monthly reminder to review your supplies and discard or donate what you no longer use.

2. Reassess Storage Needs: As your crafting interests evolve, adapt your storage solutions accordingly.

3. Designate a Clean-Up Time: After each project, allocate time to tidy up your workspace and put away materials.

Regular maintenance will keep your space organized and help you stay inspired for future projects.

Conclusion

Keeping your crafting supplies organized is essential for maintaining your creativity and productivity. By assessing your materials, selecting appropriate storage solutions, labeling effectively, creating a dedicated crafting space, and maintaining organization regularly, you set yourself up for a more enjoyable crafting experience. An organized space not only enhances efficiency but also unleashes your creative potential. So go ahead; revamp your crafting area and let your creativity flow without interruption!

How to make DIY Face Mask ExtendersHow to make DIY Face Mask Extenders

Coronavirus pandemic is taking its toll on everybody right now. More and more precautionary measures are being taken to save masses from the infection. Such preventive measures include effective lockdown and personal protective equipment such as face masks and sanitizers. Wearing a face mask is compulsory in some areas, and even some stores can restrict you from entering their store if you’re not wearing your mask. A face mask is scientifically proven to prevent infection from spreading.

Why do we need a facemask extender?

Some of us have long and tiring jobs, and more places are now requiring their employees to wear a mask. Eventually, one will have to wear a mask most of the time during the working hours, and it can leave you with some pretty bad bruise marks on the back of your ears due to tension caused by the elastic band. It is a painful experience, and almost all medical workers are suffering from it daily these days.

A facemask extender can be a lot helpful in this situation. It helps reduce tension on your ears so you can wear your mask for more extended periods without any discomfort.

How to make your facemask extender?


Crochet Extender:

This extender is washable and is really comfortable on the back of the head.

Things you’ll require:

These items can be purchased in our Supplies shop.

Steps:

  1. Take your preferred yarn, but make sure it has a bit of elasticity. It ensures comfort upon wearing.
  2. Using your crochet hook make a starting chain of 21 chains (or your desired length).

3.  Then make double crochet on the second chain from the top using the hook.

4. After making double crochet on the second chain, continue making double crochets till the 18th chain.

5. Stitch the last chain to your desired type. I’ve made mine a bit round by making two half double crochets then double crochet, triple crochet, double crochet, and a half double crochet. However, as a beginner, I won’t recommend you do this. If you’ve been making crochets for some time then it’ll be a piece of cake for you.

6. Now start making half double crochets for the next 18 chains.

7. After reaching the 18th chain, stitch this end to your desired type. You can try making both ends different too. However, I’ve made mine circular, like in step 5.

8. In this step, you’ll have to skip over the first half double crochet you made and then continue making half double crochets for the next twenty stitches and then join at the end.

9. Using scissors cut the string from yarn. At this point, your crochet face mask extender is nearly ready but needs some significant additions which we will address in the next step.

10. Sew in the remaining thread with the crochet so that no loose end remains insight. Cut off the remaining thread with scissors.

11. Attach the buttons and make sure you pass the thread multiple times through buttonholes so that they remain locked in their place.

12. There you go. Your DIY face mask extender is ready.

Or simply purchase a ready-made Ear Mask Extender from our supplies collection to save you the hassle. Shipped quickly to you.

How to take professional product photos for my Etsy shop?How to take professional product photos for my Etsy shop?

The initial Presentation of

your products online has a significant impact on sales. Under qualified product pictures erode consumers trust. Fortunate enough, you don’t need to spend thousands on equipment or hire a professional to create beautiful product photography that will instill faith in your online store and get results.
This article shows you how to save money on product photography and improve your store’s look and performance.

Camera

It’s important to invest in a good professional camera. Fortunate enough for you they have become very affordable.

Be sure to choose a camera

with professional grade lenses

that can capture video

.
Try out this Nikon D7000 in terms of its price vs. performance its not the best there is but it is perfect for starters. In terms of lenses a 105mm lens should give a beautifully focused shot, get one here by Sony . while a bit expensive, it is great for close-up work and jewelry product photography.
You may also use a smart phone to assist in taking pictures such as an iPhone 5 which has an 8-megapixel sensor and can produce professional grade shots. I also encourage you to explore using your smartphone after you have the proper setup before committing to purchasing a higher-end camera. You may be surprised at the quality similarities between an iPhone and a professional camera.

Lighting

You will need some good lights. Of course the sun produce great results. But the Sun is fickle. Try using the Elinchrom D-Lite 4 Kit, which includes two lights, tripods, and attachable diffuser squares and it gets the job done perfectly. While there are many photography lighting kits available, what’s most important for your setup is to get lights that operate in “continuous” mode versus flash only as this allows you to use them for video as well. In fact, It is best to shoot even still photographs with lights in continuous mode as this makes previewing the shot easier and adds depth to the result.

Tripods

Use if You need to take longer exposures. Holding your camera by hand will produce blurry images that are not very appealing to shoppers.

Photo Setup

It is best to shoot products in front of a classic continuous background often white, neutral grey or natural. It’s a simple and professional look that is often used by major online retailers. Fortunately, it’s simple to achieve by using a few rolls of craft paper.
Craft papers can make a nice do-it-yourself product shoot background setup if done properly.
Try to add complements to your photo such as a peice of which the product in scope can/may be used or worn with. (NB. Try not to overpower the targeted product with its complement. Color, size…etc) this also gives you the opportunity of selling multiple products in one shot.
Place your setup near a big, sunny window if you want natural light, or in a dark room if you want to use your photo lights.

Eliminate unwanted Shadows

Avoid harsh backlighting and other setups that cast shadows on the surface of the object. Keep the lights on the same side of the object as your camera, or slightly off to one side.

Clean Up

Fingerprint on your product or dust on your lens produce poor, amateur results. Buy some microfiber rags and polish and/or prepare products carefully before shooting.

Don’t be Afraid

The biggest obstacle to doing something new is often ourselves. Don’t be afraid to experiment. Be creative. It is ok to make a few mistakes on your way to gaining a deeper understanding of the process. Not only will your sales increase, you will learn a new skill along the way.

Leave your comments and questions

.